Disable administrative shares in Windows 10, Windows 8 and Windows 7
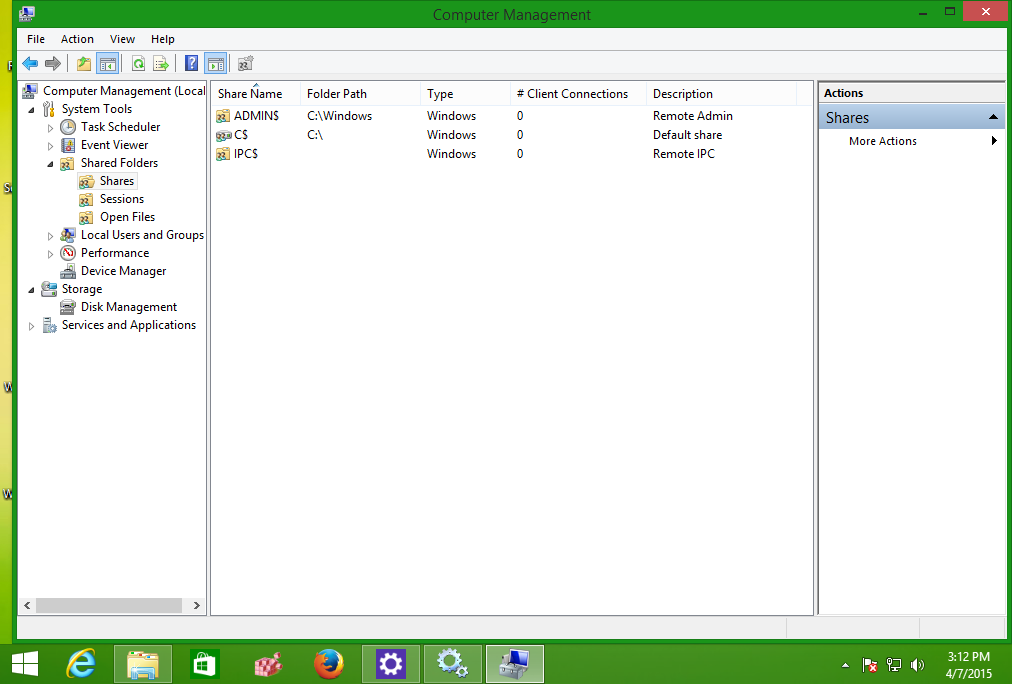
By default, Windows creates some hidden shared folders. These folders are identified by a dollar sign ($) at the end of the share name and so they are hidden. Hidden shares are those that not listed when you look at the network shares on a computer in File Explorer's Network node, or using the net view command. Windows 10, Windows 8, Windows 7 and even Vista and XP create hidden administrative shares that administrators, programs, and services can use to manage the computer environment on the network. In this article, I would like to share with you two ways to disable these shares.
By default, Windows can enable the following hidden administrative shares:
- Root partitions or volumes
- The system root folder
- The FAX$ share
- The IPC$ share
- The PRINT$ share
Any user with administrative access on your local computer or Active Directory domain (if it is connected) can access any partition on your PC without your knowledge and without you explicitly sharing a folder as long as he has your user account credentials. All partitions are shared for administrators in Windows NT operating systems due to the administrative shares feature.
I do not like this default behavior and always disable administrative shares right after the install. There are two ways to disable them.
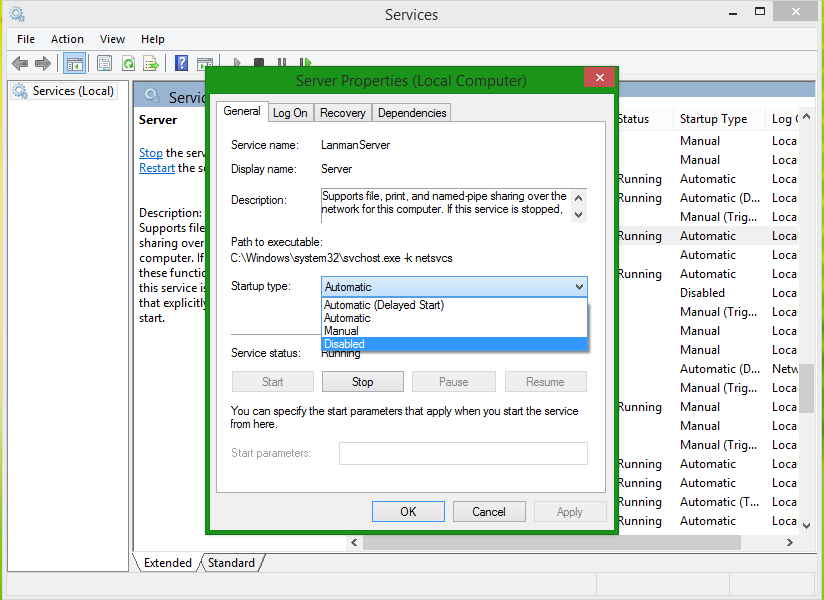
Disable administrative shares using the "Server" service.
The Server service is responsible for all shares available on your PC including administrative shares. If you do not plan to use file and print sharing at all on your PC, you can disable the Server service. This will remove access to any shared folder from your Windows operating system.
To disable the Server service:
- Press Win + R shortcut keys on the keyboard and type the following in the Run dialog:
services.msc
Press Enter.

- Scroll down the right pane to the Server service and double click it.

- In the Server Properties dialog, change the startup type from Automatic to Disabled:

- Now click the Stop button:

- Click on OK and you are done.


Now all Windows shares will not be accessible.
This solution might not be suitable for users who want to get rid of administrative shares but wish to keep their own shared folders and printers accessible from the network. These users can use the second solution below.
Disable administrative shares using a Registry tweak
- Open Registry Editor.
- Go to the following Registry key:
HKEY_LOCAL_MACHINE\SYSTEM\CurrentControlSet\Services\LanmanServer\Parameters
Tip: See how to jump to the desired Registry key with one click.
- Create a new DWORD value here, named AutoShareWks. Leave its value data as 0:

- Restart your PC.

The same can be done using Winaero Tweaker. Go to Network -> Administrative shares: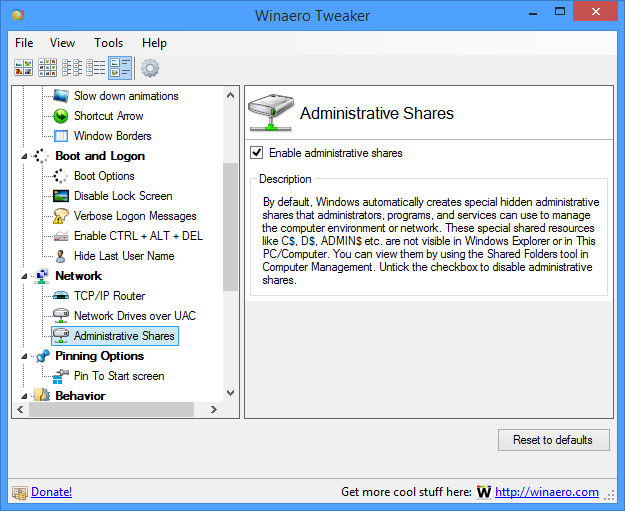
Use this option to avoid Registry editing.
That's it. Regardless of the method you used, administrative shares will be disabled.
아래 출처..
http://winaero.com/blog/disable-administrative-shares-in-windows-10-windows-8-and-windows-7/
'Developer > Windows Server' 카테고리의 다른 글
| windows 2012 R2 로그인시 시작 처리 (0) | 2018.02.07 |
|---|---|
| IIS 셋팅 백업 및 복원 (0) | 2017.01.05 |
| 32-bit Windows Script Components under 64-bit Windows (0) | 2016.08.26 |
| 시스템 종료시 DDE server window Explorer.exe 오류가 계속 발생합니다. (0) | 2016.06.13 |
| windows 10 단축키, 핫키, 화면 회전 기능 끄기 (0) | 2015.11.12 |